Connection Instructions
The following instructions cover computers running Microsoft Windows XP SP2 (English version)
1. Carefully read your computer's manual to make sure it is able to connect to WiFi networks (compatibility with 802.11b/g standards). Usually the technical features are mentioned towards near the end of the manual. Warning! Some portable computers (laptops) have an on/off switch to control wireless networking. If your machine has such a switch, make sure that it is turned on.
2. In the right side of the taskbar (system tray), double click with the left mouse button the icon that appears in the picture. If you do not see such an icon, make sure that the connection "Wireless Network Connection" is enabled in Control Panel -> Network Connections. If this is not the case, the connection is activated by double clicking the corresponding icon.

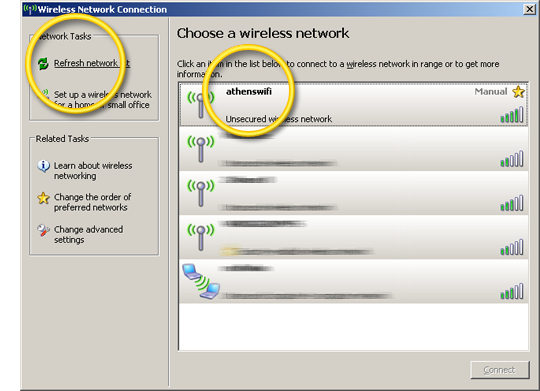
3. You must now be able to see the following window. To refresh the list of wireless networks, select the "Refresh network list" which can be seen on the upper left side of the image. Now double-click the wireless network named athenswifi.

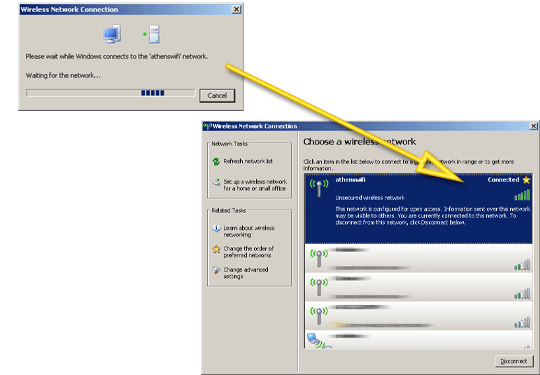
You'll see a new window, which will inform you about the logon process. Wait until this process finishes. In the window above you can see the "Connected" status next to the network name.

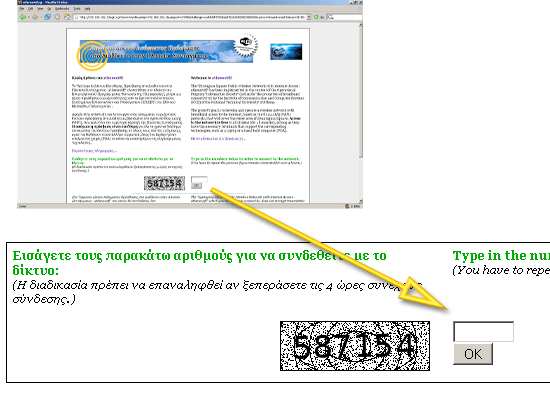
4. Open the browser of your choice and try to visit any website (eg http://www.google.gr). Your browser will display a Web page that welcomes you to the wireless network athenswifi. To complete your connection, copy the number that appears in the shaded box to the box next to it and click "OK".

5. From the moment you see the following message, you are now able to use broadband access to "surf" the Internet free of charge!

|